Pilot hole in target piece?
I was reading online about pocket hole joinery before finding this forum, and ran across this article and saw this comment (not part of main article, just a reader comment):
After clamping the joint together, use a small diameter bit to drill a pilot hole through the existing pocket hole. This will register the screw so it doesn’t wind its way out of alignment when you drill it. This is especially important for longer pieces, since clamping can be difficult.
It seems to make sense that a pilot hole in the target piece would reduce the twisting force of the target piece relative to the pocket hole piece as the screw is driven in. You still have to clamp, but seems it gives you more margin for error on your clamping.
Thoughts?
Views: 10703
Replies to This Discussion
-
Permalink Reply by Tim Grace on
-
The Kreg stepped bit drills both at the same time. The narrow tip drills the pilot hole, the larger diameter the "pocket" hole.
The Kreg screws are self drilling, so will drill the pilot in the target piece, lined up perfectly with the pocket hole.
-
Permalink Reply by Joe on
-
I'm referring to drilling a pilot hole in the target piece of wood - i.e., the piece you are attaching to the piece you've drilled the pocket hole into. In other words, after drilling the pocket hole, clamp the two pieces to be joined and then drill a pilot hole through the existing hole created by the narrow tip of the step bit.
-
-
I've never found it necessary to drill a pilot hole in the receiving workpiece.
Proper and tight clamping is necessary to prevent the workpieces from shifting, while driving in the screws.
-
-
Drilling a pilot hole in the "receiving piece" will require it to be "dead-on".
If it isn't "dead-on", the workpiece will shift during installation of the screws.
-
Permalink Reply by James P. Cottingham on
-
If the screws weren't self-tapping I could understand the need for a pilot hole. I've never had a problem with Kreg screws.
-
-
OK, sounds like the pilot hole idea might be more trouble than it's worth.
As far as clamps go, is one face clamp and one right angle clamp usually sufficient for small projects?
-
Permalink Reply by james wilhelm on
-
HI Joe , I would go with two face clamp,s , I have two of each , but one right angle clamp should work for you , if you want you can look on my home page to see what I have built , Have a good day , JIM !!!
-
-
Joe,
Yes, making a pilot hole is not worth all the fussing around you have to go through.
As I've mentioned earlier, it's not necessary.
Re clamps
>>>...is one face clamp and one right angle clamp usually sufficient .../span>
Yes, that should suffice for starters.
As you progress and expand, you may want to add clamps as needed.
#1. Face Clamp---you might consider to have a couple of these on hand. A second one comes in handy for me when joining multiple pieces and larger pieces to keep them in alignment.

Perhaps you can use other clamps. I've found these to perform much better, because of the large pads.
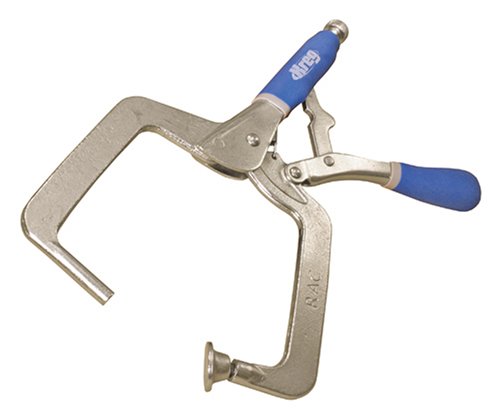
#2. Right Angle Clamp
I find this necessary to draw the joint up tight when installing the screws.
#3. large face clamp---I find this very useful for extended reach.

#4. 90 degree corner clamp

very useful when you have this situation---like in shelf joinery, and the like.


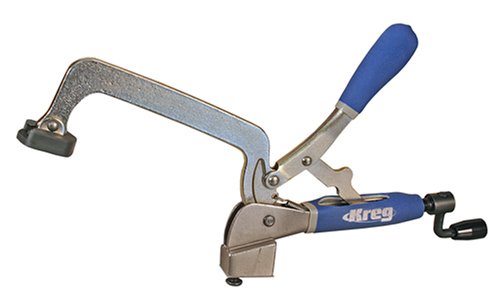
#5. long reach bench clamp---I use a couple sizes---the short and long models.
These clamps require the auxillary base plate---
the base plate is affixed to a work surface---
the screw head on the underside engages with the slot in the base plate.

base plates
a) (small) b) (large)


The base plates should be recessed (mortised) in the work top, so they're flush with the work surface.
I find the smaller one handy on a smaller worktops as well as on a sawhorse---you should keep the workpiece in place during machining.
Kreg offers a large selection of clamping systems.
Check them out.
https://www.kregtool.com/store/c7/clamping/
Enjoy yourself making projects using the Kreg joinery methods and tools.
Once you get going, I'm sure you won't look bacba and have any regrets.
Joe said:OK, sounds like the pilot hole idea might be more trouble than it's worth.
As far as clamps go, is one face clamp and one right angle clamp usually sufficient for small projects?
-
Permalink Reply by Russ Haynes on
-
It depends on the material. I have had problems with pocket screws splitting out hard maple that is 3/4" thick, even though I only use Kreg screws, which are self-tapping. When I have drilled pilot holes into the target piece with a 3/32" bit, it seems to avoid split out. I also make sure to start the screws with a drill set very light on the chuck, then finish them by hand.
-
-
I know this is a bit old, but I couldn't agree more. I'm building red oak cabinet faces and I've had it split in the corner piece and once in the middle on a cross bar. Looking around for a bit do pilot holes now. Also I've had some issue with kreg screw heads coming off when attaching the oak. And I've had the tip of my kreg tapping bit break once already. If I start have too many more issues then I might go back to using dowels...
Russ Haynes said:It depends on the material. I have had problems with pocket screws splitting out hard maple that is 3/4" thick, even though I only use Kreg screws, which are self-tapping. When I have drilled pilot holes into the target piece with a 3/32" bit, it seems to avoid split out. I also make sure to start the screws with a drill set very light on the chuck, then finish them by hand.
-
-
When working with hardwoods it is best to be prepared to start with a pocket hole as usual. But when a danger of a split might be apparent, I would recommend using a bit that is slightly smaller than the pilot hole with a stop collar to prevent over drilling. As mentioned above splits are not always apparent and can be irritating. Softwoods are generally more forgiving, yet they too can be splitters. Using the Kreg screws does not often get a split in any wood. What they do is give you a tight fitting joint that does not require advanced carpentry skills.
Need Help?
For Technical Support, please call 800-447-8638 or send a message. Reps are available Monday through Friday from 8am to 5pm CST.
Popular Posts & Projects
Videos
Forum
Free Hand Guard (dust collection)
Hi. I'm wondering if anyone has used the Woodpecker Free Hand Guard for dust collection on their bench top router table during pattern routing. How effective is it? It's adaptable to any router table. Continue
Started by Keith Morgan in Beginners' Zone Nov 8, 2024.
Keg Easy-Step Collar and XL 1 Reply
Does Keg Easy-Step Collar work with Kreg XL?
Started by Nick in Beginners' Zone. Last reply by Ken Darga Oct 28, 2024.
Product Reviews
New Kreg 720Pro
I saw the video Kreg put out for this new jig and had high hopes for it.
I purchased one today and am very disappointed with it.
First the docking station is extremely cheap. The plastic is pathetic. A Lego has more…
ContinuePosted by Duke Leon on February 15, 2021 at 9:00pm
© 2025 Created by KregRep.
Powered by
![]()
Badges | Report an Issue | Privacy Policy | Terms of Service