Built Ins covered with melamine
The nice clean look of cabinets built with wood carcass covered with melamine. Any recommendations?
Views: 864
Replies to This Discussion
-
Permalink Reply by Ken Darga on
-
Home Depot and Lowes offers this material---
white thermally-fused malamine---
inexpensive material for making cabinet carcases
http://www.homedepot.com/p/3-4-x-49-x-97-S11-White-Thermally-fused-...
http://www.lowes.com/pd_79611-99899-339307_0__?productId=3605068
-
Permalink Reply by Gary roofner on
-
Ken your think like I do when walk down the aisle in home depot with the melamine panels. Just add some Hardwood face frames and you can have some nice looking cabinets and desks. The hardwood frames can make them rugged economical pieces.
-
Permalink Reply by Rita B. on
-
I have not worked with it but have seen it. Do you need a special saw blade? Is there much of a problem with tear out? I know it is quite heavy!
-
-
I'm thinking of making some build in for desk and storage to go with .
-
-
Rita,
i use fine tooth saw blades---
60-80 tooth---
no tearout & chipping.
Set the blade depth to have 1/4" of the blade teeth out the finished side.
Use a steady slow feed, so as to allow the gullets in the saw blades, to carry away the chips.
The result will provide a very smooth cut.
Make your cuts, so that any chip-out on the workpiece, will be on the inside of the project.
One method I use often---
cut the work-piece 1/16 - 1/8'' oversize,
followed by making the final cut with a router, using a carbide spiral bit.
A spiral bit will provide the most desireable finished cut edge.
Rita B. said:>>>...Do you need a special saw blade? Is there much of a problem with tear out? I know it is quite heavy!
-
-
Gary,
When using malamine surfaced particle board, the cut edge can be covered with a frame member or edge-band.
Some malamine boards are available that have the ends finished.
Plan the project so that maximum use of the board is used effeciently---
least amount of waste---
and with the least amount of materials added.
Gary roofner said:>>>...add some Hardwood face frames and you can have some nice looking cabinets and desks. The hardwood frames can make them rugged economical pieces..../p>
-
-
Rita,
FYI
You can get a Diablo/ Freud 10" 60 tooth carbide blade, from Home Depot, for less than $50.
It'll suffice nicely, for most DYI tasks.
You won't need a 10" blade for cutting 3/4 stock.
With the blade depth set properly, most of the say blade is under the table anyway.
You can use 6-7" saw blades in your 10" table saw.
You only need the 10" blade, when cutting thick stock, such as 4x4's, or the like.
24 tooth is suitable for cutting construction lumber---2x stock, and such.
I generally use smaller blades, in the 6-7" size, for most of my cutting.
I have several saws, that use 6-7" blades---and they can be used interchangeably, in my table saws.
I prefer the smaller dia blades---saves $$$.
I don't run a sawmill or run a cabinet shop that is operating 8 hrs a day, 5 days a week.
EX:
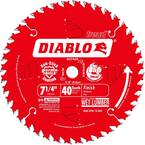 40 tooth $15
 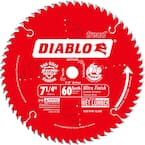 60 tooth $20
I ran out and bought a $100+ 40 tooth carbide saw blade, based on others recommendations---"ya gotta have this blade---it'll last a lifetime---it's the best in the business"---yada yada yada.
Well---I get lots of fine chip-out, cutting malamine and thin plywood.
I get smooth cuts and NO chip-out from my 60-80 tooth Diablo blades.
You can buy thin kerf blades, and use a blade stabilzer, to elimiate the wobble, when used in a table saw.
Thin kerf saw blades, require 25% less horse-power---easier on the table saw motor.
(I don't use truck tires on my mini van).
For making nice square and flat bottom rabbets and dados, I use a 6-7" flat top ground tooth carbide saw blade. It makes a nice flat bottom cut, without all the ridges, that one gets when using an ATB blade.
For the DYI/homeowner, it isn't necessary to run out and buy a $100-$125 saw blade, as has been mentioned in previous posts. It's just not practical for the DYI/homeowner.
That's my story and I'm sticking to it.
I don't drive a dual-axel dump truck to run to the grocery store, for a gal of milk.
Rita B. said:
I have not worked with it but have seen it. Do you need a special saw blade? Is there much of a problem with tear out? I know it is quite heavy!
-
-
Thanks so much for that info Ken. Very good to know that about the blades being interchangeable. Since getting my table saw, I will now need to increase by saw blade inventory and will watch for sales. Also find your info about going slow and steady to allow the tool to clear the chips while using the saw or drill. Makes sense and I am sure at present, I am not using the tools to their best advantage. I understand the thin kerf, but not familiar with the blade stabilizer. Are you referring to a zero clearance insert? I just got one this past week but have not installed it yet.
-
-
Rita,
A "blade stabilizer" is a "precision" machined washer like object, that fits over the arbor.
Two stablilizers, one on each side of the blade, sandwiches the saw blade body.
DIA: 3-4"
THK: approx 1/4" (2X saw kerf)
ID: 5/8"

When placed on both sides of the saw blade, the stabilizer is essential to dampen vibration and run-out---
eliminating blade wobble.
Some saws are equipped with a large dia & thick (the "inside collar"),
that is in positioin on your saw, for the blade to rest against.
This collar rigidizes the blade and provides a solid platform for the saw blade to rest against, and must be in place.
When the saw blade is installed, the outside collar is atop the blade, before the nut is installed and tightened.
This collar is necessary and must be in place, before tightening the blade in place, with the locking nut.
When using a thin body saw blade, blade wobble can occur---
more pronounced with large dia blades, such as 10" and larger diameter blades.
The blade stabilizers are necessary.
I use a blade stabilizer when using thin bodied saw blades.
When the inside collar is a large diameter and thick section,
I only put the stabilizer on the outside of the saw blade.
When a stabilizer is placed on the inside of the sawblade, the sawblade will be repositioned further out---
which may result in interference with the blade insert.
NOTE: Blade clearance MUST to be checked before turning on the saw.
NOTE: when using zero-clearance blade inserts, it may be necessary to have a different insert for each saw blade.
Most table saws, out of the box, are furnished with an insert with a wide slot, so as to accommodate various saw blades.
-
Permalink Reply by Jay Boutwell on
-
Blade stabilizer is a good thing however it is not possible to install two ( one on each side of the blade) on most saw arbor shafts and still have the arbor collars in place and enough room to safely install the arbor nut. To be safe there should be at least two threads exposed beyond the nut.
Of importance when using stabilizers, the stabilizer should be installed just before the outside collar and nut is applied. If you do not do this then the blade will be cutting in a different location on the arbor shaft and therefore will cause your fence to be out of adjustment the amount of the thickness of the stabilizer. If the stabilizer is 1/8th inch thick the saw will cut 1/8 inch off its initial setting. If it is installed just before the outer shaft collar and nut it will remain unaffected. The reason being is that the saw blade is still in the same position on the arbor.
The better saws have a arbor that is machined to have the saw mounting directly against its shoulder and does not have a separate collar of which the blade mounts against. This is where some of the accuracy of the saw depends on. If the arbor is not true and runs with an excessive run out, it is a saw that will never cut true regardless of how many stabilizers you add or how true the saw blade is. It will always cut a kerf that is larger than the blades intended kerf. Although the stabilizer will dampen vibration it will not dampen all that will come from a bad blade or a arbor that runs untrue. The amount will depend on how severe the run out is.
The same is true with a saw that has the arbor running at an angle that is not a true 90 degrees to the direction of the feed of the wood. Example: If you are ripping a piece of wood that you are running against a fence that is set true and the saw blade is cutting into the wood at an angle to the pressure of the feed. This will result is a wide kerf but what is most important is the danger that it poses on the operator. An inaccurate cut is nothing compared to the Violent kick backs and cuts that occur from this very thing.
A saw that is misaligned and out of adjustment poses a threat to anyone who flips the switch. This is one of the reasons that I will never advise anyone to use any thing on the saw that saw was was not engineered to use. I will never alter a saw blade size diameter or use any blade that is damaged or even dull or inferior and not meant for the use in a table saw. If the saw is engineered to use a 10 inch blade then that is what it is built for. I own a 10 inch table saw and for that saw I use the best quality that I can get. Sure I spend more money on it but I also get quality out it as well as a long duration of use as well as the extra margin of safety. I guess what I am saying here is that a table saw or any power tool that will cut wood will sure cut flesh and it never seems to slow down or hesitate to do so. Just let your guard down once and it can be very costly.
If anyone out there doubts me, then you should have been the deputy in my shoes one morning around 30 years ago when I was sent to a house to check on the welfare of a young man that was ripping lumber in the basement shop of his home. He was in the process of ripping 2x4's for furring strips to add insulation to the basement walls. Up on arrival I heard a saw running but no answers to my calls. I entered the home and I still heard the saw running in the basement. I went down to the basement and I found a man still slumped on the table saw in a massive pool of blood. He had been the victim of a kickback from the 2x4 he was ripping and a piece about 2 1/2 feet long sliver about 1" plus in diameter had broken free from the kickback and had penetrated the chest cavity and into his heart exiting the back near the inter shoulder blade.
The cause of the kick back was ripping wet and crooked lumber. The point here is that even with the best of tools in the best of shape, woodworking is still a very dangerous thing. So you increase the chance every time you alter the intended use of equipment or get the least bit careless. Here this young man lost his life because of a bad piece of a 2x4 that should never been used in the first place. I think then a new 2x4 was worth a little more that a dollar. It was not the table saw that killed him, It was the bad judgment he used the day he lost his life. So please what ever you do, think it through and consider the possibilities and then ask your self is it worth it.
That, like I stated, has been around 30 years ago and the thing I see and remember the most about that day and every day that I flip on my saw or other woodworking equipment is the large pool of Blood.
If any one is interested, about two years ago I wrote a large article about table saw safety and how to set up and make your table saw safe and accurate. I went through all the steps of a complete table saw set up from adjustments of the trunnions and the arbor shaft to truing them with the miter gauge slots. I also covered fence adjustments. You should be able to locate it in the discussions.
-
-
Building melamine cabinets and other such projects is a pretty much straight forward operation. There are a few precautions that should be considered when cutting and building with it. It is heavy and brittle and easily will break out the screws that are placed near an edge. Cutting it is a dusty event of which makes plywood and other wood pretty clean affair. It comes in sheets of 49 inches wide and 97 inches long to allow for standard cabinet building sizes and allowing the inch for the saw kerf waste.
Cutting it on a concrete or smooth floor makes is a slick event of somewhat compared to ice. When cut with a good saw blade it has a knife edge and it will cut you very deep without your help. All you have to do is slide your hand along the edge or allow any portion of your arm of bare leg run against it.
It is a material that is very dense and stable but water and it are enemies. Once it is wet it will swell and will never shrink back like wood can be made to do. It needs its exposed edges covered to protect it from any moisture even vapor such as a steam from a hot shower. It is a preferred material in medical and industrial applications.
It will take the pocket screws well as long as you do not apply them near the edge and do not over drive them. It is a hard durable finish and pretty resistant to the common knocks and bangs in normal use.
I have build several for both commercial and home uses and although I do not like it for high end cabinet work it makes it very affordable of those needing a cabinet that will give long service as long as it is build correctly.
There are at least two grades of which the only one I will use is the commercial grade.
I use the pocket screw technology to build the cases and also use glue. There is only one glue I would suggest and that it a glue made for melamine. The brand name is "ROO' and there is two types of this glue made for different purposes. There is one made or gluing melamine to melamine and the other is made for gluing the rough surface (raw edges wood particles to other wood.
As far as having to have a special blade to cut it I don't use one. I use the same blade that I use for cross cutting and ripping both soft and hardwood lumber. It is a "Forrest Woodworker" 40 tooth combination. It cuts razor edges with out chip out and does not tear out the core like some blades do. There is special blades made for melamine however I have found it unnecessary.
My preference in building a cabinet is to use a hard wood face frame and actually hardwood doors and drawers how ever on occasion I will alter the method such as I did in the which melamine cabinets that I recently built and posted. You can build them in two styles of which is both European frameless using either a melamine tape applied to the raw edge or using hardwood ripped to the same thickness. You can also build them using the standard face frame style and including either a flat slab melamine door or a solid hardwood door of any style you can imagine from raised panel to flat panel and even the glass door with or without divided light styles.
I hope I have answered any questions you may have and if not please contact me. I have build several melamine cabinets.
-
-
Sorry I am late replying back Jay yes you did . I want make to make a solid wood frame and to attache the melamine to frame. My next question is it better to screw into the melamine or drill a hole the same size as the screw through the melamine into the solid wood?
Need Help?
For Technical Support, please call 800-447-8638 or send a message. Reps are available Monday through Friday from 8am to 5pm CST.
Popular Posts & Projects
Videos
Forum
Jig settings for 2 ¾ x 1 ½ boards with 30 degree miters?
I making a hex ring out of 2x4s ripped to 2 ¾ inches wide with 30 degree miters. What setting on the Jig should I used? 1 ½ is too much. Thanks.Continue
Started by Patrick Halinski in Kreg Jig® Operation Dec 30, 2023.
40mm Cup Hinge Jig Question
Hi All.....I have the 35mm Kreg Jig hinge drill guide. The guide is great for 35mm Hinge Cups, but I have a speciality 40MM hinge cup to drill.Has anyone adapted the Kreg guide to work with 40mm Forsner drill bits? Or have a guide that works…Continue
Started by Ed Anderson in Beginners' Zone Oct 3, 2023.
Product Reviews
New Kreg 720Pro
I saw the video Kreg put out for this new jig and had high hopes for it.
I purchased one today and am very disappointed with it.
First the docking station is extremely cheap. The plastic is pathetic. A Lego has more…
ContinuePosted by Duke Leon on February 15, 2021 at 9:00pm
Not Pleased With Pocket Hole Construction
Several months ago, I purchased the Kreg K4MS so that I could build the Lego Table as outlined on the companion "buildsomething" web site which exclusively uses pocket hole construction. I have considerable experience with conventional…
ContinuePosted by Robert Ringel on September 17, 2020 at 1:48pm — 9 Comments
© 2024 Created by KregRep.
Powered by
![]()
Badges | Report an Issue | Privacy Policy | Terms of Service